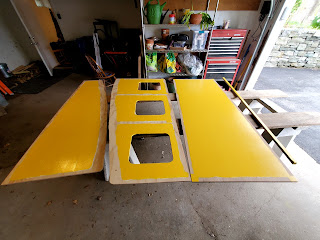
And now for many photos of how I put the sliding tracks on for the sliding berth top.
The trick here was to get the 4 slides EXACTLY parallel.
Here you see them laid out generally where they'll go.I decided that these would be mounted upside down compared to how you'd do it for a normal drawer; I want the sliding top to have the most support, and therefore the wider female part of the slide. Plus, anything that falls under the berth top will have less of a chance of getting jammed in the slider. Not a major issue, but an example of how many little design decisions go with every part of this boat project thing. And nearly all my decisions are guesses.
Anyway, I drilled pilot holes and counter sinks on the ends of each of the male rails. Note to self: your countersinks suck. They go dull nearly instantly. It might be worth an investment in a good one.
I temporarily attach one side only of each (the left hand / inboard side in the previous picture) rail, except for the second from the forward end, which is attached on both ends. This will allow the other three to shift to parallel to this fixed one in the next steps.
I slipped the female slides onto each, laid a long narrow piece of scrap 1/4" ply across all of them at the INBOARD end, and carefully drilled a pilot hole in the the outboard edge of each just big enough for a brad to fit in.
This locked the distance of the inboard ends of the female sliders to the distance between the inboard ends of the male sliders which are fixed to the support surface.
Sliding those sliders to the outboard end now guarantees that the distance between the sliders on the inboard ends are now equal to the distance on the outboard ends. To whit: contraption's sliders are now parallel to each other. They may not be exactly square with the back edge, but they don't need to be. I thought this rather ingenious 'cause I thought it up all by myself. It's probably a technique the ancient Egyptians knew. I'm not really breaking new geometric carpentry ground here.
I screwed the males sliders to the under-piece, locking in that delicious parallelism.
I clamped the top on to keep anything from shifting, then drilled pilot holes and temporarily fixed both ends of the female sliders to the top. The top now has four parallel female slider fixed to it to match the parallel male pieces below.
I clamped the top on to keep anything from shifting, then drilled pilot holes and temporarily fixed both ends of the female sliders to the top. The top now has four parallel female slider fixed to it to match the parallel male pieces below.
Another note to self: put some butcher's wax on the contact surfaces of the sliders before all this assembly. I ended up needing some significant taps with mallet to get this apart. With the wax everything slides much better.
Then the whole thing gets marked with various pencil lines so I can take it apart, put glue on it, and hopefully realign the screw holes again while it's all messy and slippery and squeeze out is covering said pencil lines and I'm cussing quietly to myself while moving quickly and trying to catch significant glue drips and turn clamps with one hand while holding the wood in place with my teeth and my other hand and ignoring my phone which always chooses this time to ring and then one of the screws strips out and I have to get the needle nose vice grips to extract and replace it and now another piece has slipped and oh crap the clamping caul is too tight and distorting the assembly and...
Then the whole thing gets marked with various pencil lines so I can take it apart, put glue on it, and hopefully realign the screw holes again while it's all messy and slippery and squeeze out is covering said pencil lines and I'm cussing quietly to myself while moving quickly and trying to catch significant glue drips and turn clamps with one hand while holding the wood in place with my teeth and my other hand and ignoring my phone which always chooses this time to ring and then one of the screws strips out and I have to get the needle nose vice grips to extract and replace it and now another piece has slipped and oh crap the clamping caul is too tight and distorting the assembly and...
So, normal glue up procedure. We see the calm clamped result here.
And the exciting process repeated for the underside of the top with the female sliders here.
And the exciting process repeated for the underside of the top with the female sliders here.
And the whole assembly.
I did end up buying a better countersink. Carbide and soooooo much better. I'll have to think about whether it should be used on fiberglass, or get a second one for that. They are quite expensive, though. I made up a whole bunch of these stand-off blocks and epoxied them in the lockers. They are 1" thick to match the insulation (which I ordered) and will serve as the anchor points for the insulation cover panels I need to make out of 1/4" or 6mm ply. I am tempted to use luan door skin for this because it's so cheap, but it's probably false economy. It's not strong, not waterproof glues, and has the potential to make my life miserable if it fails in three years. I'll probably go with okoume 6mm.


