Friday, April 9, 2021

Building the Sail

 A long hiatus - years actually, but I'm back at work.


I've been building the split rig sail over the last two months - about 25-30 hours a week.


 I made templates for both the mains (simple rounding off a parallelogram base) and the jibs (45 degree shelf foot) for the bottom four panels.  This picture shows the jib patterns. 

Here's just lots of fabric at some point in the process.   I used Top Gun 9 cloth.  Junk rigs, and especially cambered junk rigs, don't put much strain on the fabric, so you can get away with awning-type materials.  But you need to put a lot a strength in the bolt ropes that run around the perimeter.  I used seat belt webbing. 

Here are the jibs and mains laid next to each other.  It all seemed to fit correctly.  

This is panel 4 attached to the battens.  The camber looks just like I'd hoped. 

Same thing, other side. 

This is the top two panels.  They are full length, with lower camber. They're best considered storm panels.  I've got new energy to get the boat done, because I really want to see these things hanging from the mast.


Monday, July 8, 2019

Ladder secured. Duh.

Minor work done on the boat this weekend - I mostly helped Lisa put the final prep sanding and first coats of varnish on the teardrop camper.  (That's a CLC canoe hanging in the background.)


I kept my promise and rigged a simple method to safe the ladder.  It's just an angled piece of white ash I had laying around, screwed to the ladder with another screw sticking down as a pin.  That pin sits in a drilled out hole in the 2x4 screwed to the companionway counter bulkhead.  The ladder is now easily removed and replaced and secure to use.  It took all of 15 minutes. Because that's usually how much effort it takes to avoid most of the stupid, dangerous, careless things I've done in life.


I tabbed some of the galley lockers.  Molly came over to help for a few hours and it was the height of luxury to have someone else mix up the fillet material and wet out the glass tape.  There were moments where I was even kinda doing nothin'.  Such an easy pace made me feel a little lost.  But I could get used to it.


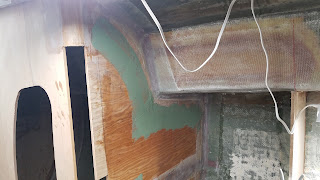
I also tried out Total Boat's two-part fairing compound, Total Fair.  It mixed easily enough with its yellow and blue components turning into a dull, even green when combined.  The thixotropic viscosity is greater than drywall mud, but spreads easily, if slower, with no pinholes.  I think I like it.  I haven't sanded it yet, but reviews are generally good.  The smell, however, is unpleasant.  It reminds me of cheep rubber, um, adult-novelty toys from the 1990s.  I don't mind the memories, but the odor is too chemical. Both then and now.


Finally, I noticed this vine climbing up the keel;  the boat's been on the hard way too long.


Wednesday, July 3, 2019

Tabbing in more interior bulkheads

In the spirit of getting the sole down, I've tabbed the inboard edges of all these bulkheads to the hull.  I'll work on the outboard sides... some other time.  The bulkhead defining the forward end of the chart table and aft end of the port settee got the standard double layer of 1708 6 inch wide biaxial glass tape overlapped on the fillet by two inches.  All the others received one layer.  I figure that since I could have opted to run them over the sole, they are not structural components.  I just need them to not jump around overmuch.

I also sanded the radiused corners all fair and flush and wrapped them with 10 oz cloth.


I made the mistake of tabbing several sections in the morning after a cool evening coming into a hot day.  The warming plywood outgassed under the glass, creating a multitude of air bubbles along the edges - some pretty sizable.  You can see them in the picture below as light spots along the top of the tape. The fillet is a solid connection - that's just glare in the curve you see there. Now, if I were a perfectionist, I'd grind that off and do it all over.  But perfect is the enemy of both good and done.  I've read that bubbles under the glass weaken the structure and trap water vapor via osmosis and thereby promote rot. I buy the lowered strength point; but again, these don't need to be that strong.  The rot and osmosis thing... I think it's mostly the former.

Outgassing bubbles along top of tape.  Disappointing, but not disastrous.
I've had the temporary companionway stepladder slip out from under me twice as I came up it.    Once while carrying a shopvac half-filled with water from scrubbing the bilge.  The resultant bone chip in my left elbow matches the one I created last year in my right while removing the steering quadrant.  I can only plead congenital stupidity.  I knew that the hot-glued blocks I had under the ladder feet had come un-hot-glued.  There's no way I should have that ladder unsecured. I've just been too "busy" to rig up a secure but easily moved thingamabob.  I'm stating here that my first order of business is to do that.  Maybe I'll hold myself accountable rather than holding myself in pain.

Tuesday, July 2, 2019

Adding a rudder endplate

For those of you who follow posts on the Junk Rig Association's web site, you'll be familiar with Arne's refrain of, "Put an end plate on your rudder."  So I'm doing that.

The geometry of adding a horizontal component to the skeg-hung rudder proved a head scratcher.  I could have simply slapped the end plate on the rudder-only portion of the combination, but for reasons known only to my subconscious, I wanted it to be cooler than that.  I also want to be able to remove the skeg shoe without dropping the whole rudder.  An endplate that extends forward under the shoe interferes with that.

Having puzzled and puzzled 'till my puz'ler was sore, I concluded that the rudder, pivoting around a center under the skeg, would get a smaller portion of the end plate than I intuited.  The skeg itself needs a plate with the aft 3/4 perfectly round so the rudder plate can pivot clean around its perimeter with no room for a pesky stray line to get squeezed in between.


I very carefully established the true pivot center and tacked on the quasi-circular skeg endplate and its matching rudder endplate.  Then I took the skeg and rudder off the boat and brought the now-even-more-awkward-and-heavy-to-move kit into the basement.  I'll round over and glass 'em on a day that's too hot to work on the boat.

I'm also trying to figure out a rudder stop.  With the conversion to a tiller and a rudder tube, the boat no longer has a quadrant below decks with its glassed-in heavy duty stops.  I'm considering adding a top plate to the rudder with stops, but the structure would be huge.  Below is bit of cardboard showing how much the rudder swings, and consequently how big the plate would need to be.  I don't like it.


I'll probably build in the stops up in the cockpit - a key below the tiller head that bears on stops somehow attached either the cockpit sole or the rudder tube.  In any case these things have to be silly strong:  the leverage produced by the tiller or rudder itself when making a sternboard* is considerable.

making a sternboard is one of those fancy boaty phrases that make me feel all nautical. It just means going backwards.

Limber hole cleanup

The bilge was a scary place when I opened it up, as expected with a 30 year old boat.  The smell was... noteworthy.  I've since scrubbed it several times and added a garboard drain to allow easier cleaning on the hard.

The original floors are foam filled and covered with a thick layup of fiberglass.  Now, we all know about how poorly polyester resin adheres to cured polyester resin, and the terrifically prudent thing to do would be to grind out the old floors and install new ones with heavy layup and epoxy.  But I've searched the web and not found significant accounts of a Pearson 10M's floors tearing up in a grounding. So this one thing - one thing - I  think I'll skip.  Neptune please take pity on a poor man's keel.


The bilge was pretty ugly.  The limber holes were just rubber hose stuck under the glass as it went in, and they'd long since come loose and let water into the foam.  The surface of the bilge is filled with nooks and crannies for gunk to hang out.  I ground out the limber holes a bit, then mixed up batches of thickened epoxy resin and mooshed and mashed and squarshed it up into the foam and gaps hiding under there.  Then I slipped strips of 10 oz cloth cut on bias through the holes and wrapped them up the sides of the floors.


Hopefully, this will seal the foam and also allow easier bilge drainage to the very small forward lowest point to which the bilge pump intake will run.

Meanwhile, Lisa's been busy in the driveway finishing this:


Laying out the interior for real

Over the last few weeks I've placed the rest of the major interior bulkheads, settee faces, and other bits that extend down to the sole.  I'd like to focus on getting the sole down, and I need to finish up these items before I can do that.


Sharp corners on boats hurt.  I milled some white ash to make approximately 2.25" radius corners.  It was a bit of trigonometry to figure it out, but they came out okay. Not perfect, but good enough.

I didn't really know what all this interior would look like so, as per the plan, I've been designing my way forward.  Having decided at the last minute to move the nav station aft shifted the port settee forward.  The hull comes in too tight there to allow the settee to turn into a berth, so I had to bump it in about a foot on the last forward 18 inches.  I'm not sure how all the corners above it are going to work out.

The radiused white ash corner pieces are merely filleted on the inside with epoxy and woodflour.  I'll glass the outsides with 10oz fabric later.

Turning to the aft end of the cabin, I tacked in athwarthship galley bulkheads/cabinet faces, and the fore'naft head  bulkhead.  That last one really helped define the companionway space.  I was eager to get the long bulkhead under the companionway in to really get the feel.


I spent a fair bit of time puzzling over the galley toe kicks.  The aft counter will house the sink, and the toekick below  it will have two foot pumps for salt and freshwater, so I made it extra high - about 8 inches.  The forward toekick will be 3.5 inches high once the sole is in.

Right about this time I went back and reviewed advice I'd received from David Tyler on the JRA a few years ago about whether to extend all these bulkheads down to the bilge. It turns out I've not done it the way he recommended and I decided.  The plan was to get the sole down after only the major bulkheads were in place, and all these would go down over that. Apparently it keeps the lockers dryer.  Oops.  I'm not going back now.