A few very productive days if I do say so myself. And this is with me going for a 20 minute paramotor flight on Tuesday afternoon. I'd have stayed in the sky longer, but my hands got cold, my left should started to complain at keeping my hands on the break toggles, and I'm not yet comfortable enough to just stow the toggles and fly with the throttle and weight shift only. Soon. Landed on my arse, too.

So I'm using this stuff in the bilge. I used it already in the chain locker and it cured well enough given time and over primer.

However, I noticed this. I'm not sure why it's so "For Metal Substrates Only." It's not something chemical, as far as I can think of. So it's probably that the paint doesn't flex very well and so isn't great for surfaces that contract/expand much, or dent easily. Anyway, I'm using it.

I like the bright yellow color; I'm not sure why most people paint their bilges that sad grey. It'll be like a burst of sunshine whenever I open an access hole.

The cockpit is getting a heavy weather oh shit we've been pooped drain. That's the cutout just above the sole.

First I had to plug up some ugliness at the bottom of the lazarette. Filled with fairing mix, I'll put a piece of glass over it later.

This is the only bulkhead remaining from the original construction. I didn't see a reason to replace it, though the work is pretty messy. That gap in the plywood here just doesn't even make sense.

This is the other side of the gap - looking forward from inside the lazarette. In order to glass the tube in solidly, I need to tidy this up a bit to make a better landing area for the 1708 tape.
 I made the tube 9" x 3" ID cross section to really get the water out of the cockpit fast. I made the tube out of fiberglass wrapped around a plastic downspout cut in half and separated by two pieces of luan doorskin.
You can just barely see on the right the cleanup work on the bulkhead. This is a day later when things are ready for installation.

This was pretty straightforward except that in order to glass the bottom aft portion, I was working upside down with most of my body stuffed into the lazarette opening. The little area between the tube and the existing centerline stiffener is touchy - I'll let what I've done so far cure, then come back to grind it clean and finish up.

This is that pesky underside. I'll have to grind a little of the side tabbing off here, too, before painting. You can bet that will be fun, with my face two inches away, upside down.
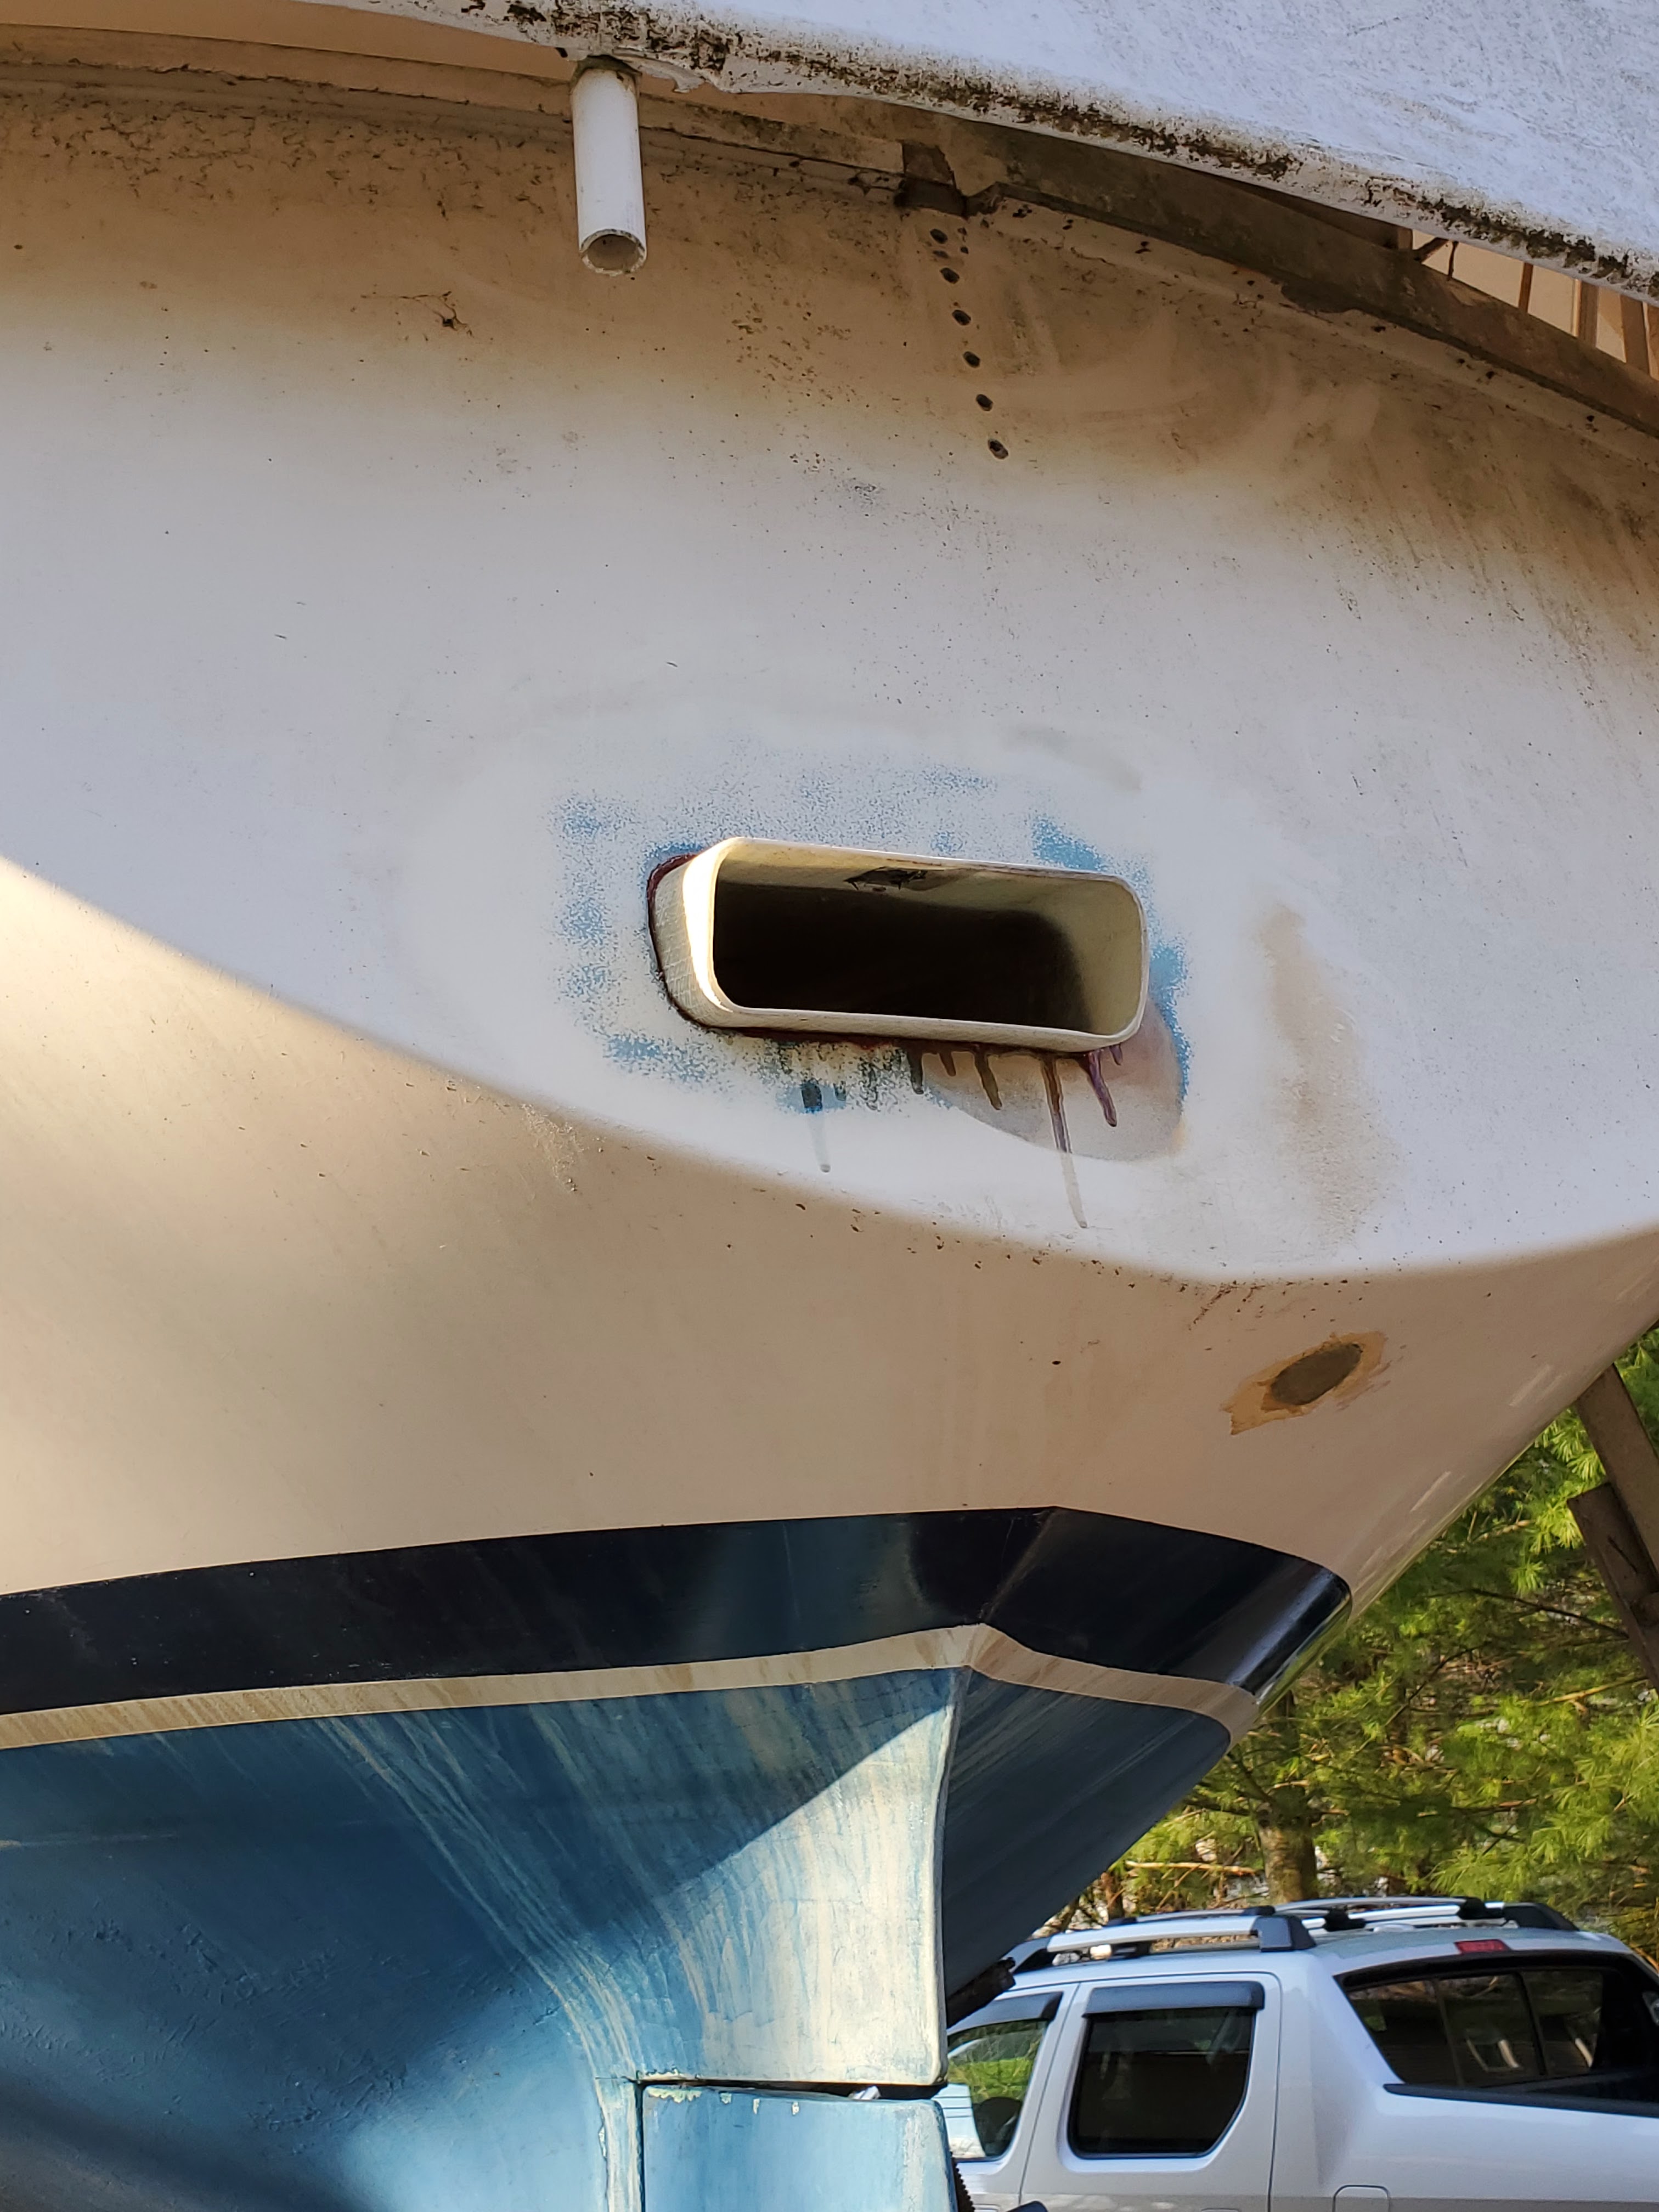
And here's it sticking out the transom.

You can see right into the companion way.

I got a second coat on the bilge and a first coat on the bottom of the sole.
 Epoxy coating the aft sections on of the sole
The aft three floors glassed in.

And finally, the funky corner piece in the head that will provide the surface for the grab rail near the nav station. Cut, tacked, and glassed.
No comments:
Post a Comment